Proto-Personas
Create a provisional representation of a user based on existing knowledge and assumptions
Phases
Suggested Time
45-60 min
Participants
Core team, stakeholders
Why do it?
The proto-persona creates alignment around the assumptions the team and stakeholders have with regard to the user. It allows the core team to make smart decisions about who to target for exploratory research during the Discovery phase of the project.
When to do it?
- There is no relevant validated persona available for the product and a starting point is needed to embark on discovery research.
- As early as possible, usually during Kickoff.
What supplies are needed?
- Whiteboard or digital version like Miro
- Paper
- Sharpies / markers
- Sticky dots
- Scissors (optional)
How to use this method remotely?
There is currently a remote template available in Miro. Here you will find step instructions on how to conduct this practice remotely including general tips and info.
1. Open Miro. In the side menu, select 'Templates'

2. Search for "Tanzu" to see all, or 2. Search for "Tanzu" to see all, or click here to use this template
How to Use this Method
Remote Tip: For distributed teams, use Miro or a similar “digital whiteboard” and adapt the in-person aspects to the digital world, such as drawing and using sticky notes.
Sample Agenda & Prompts
-
Divide room into small groups and give a piece of paper to each group
Tip: If the group is small, you can also do this exercise individually. For remote users, many video chat systems support “breakout rooms” or similar means to temporarily divide large groups into smaller groups for closer collaboration.
-
Define “persona” for the room and remind all participants this is a provisional persona—through research, what we think we know about this person will change and evolve
Example: “A persona is a composite user used to create empathy on the team and allows you to understand the users well and design a product for them.”
“Note that personas are not about demographics, they are about the problems and challenges faced by individuals.”

Image Credit: NetBase Solutions Inc.
-
Have each group (or person) fold paper into quadrants
-
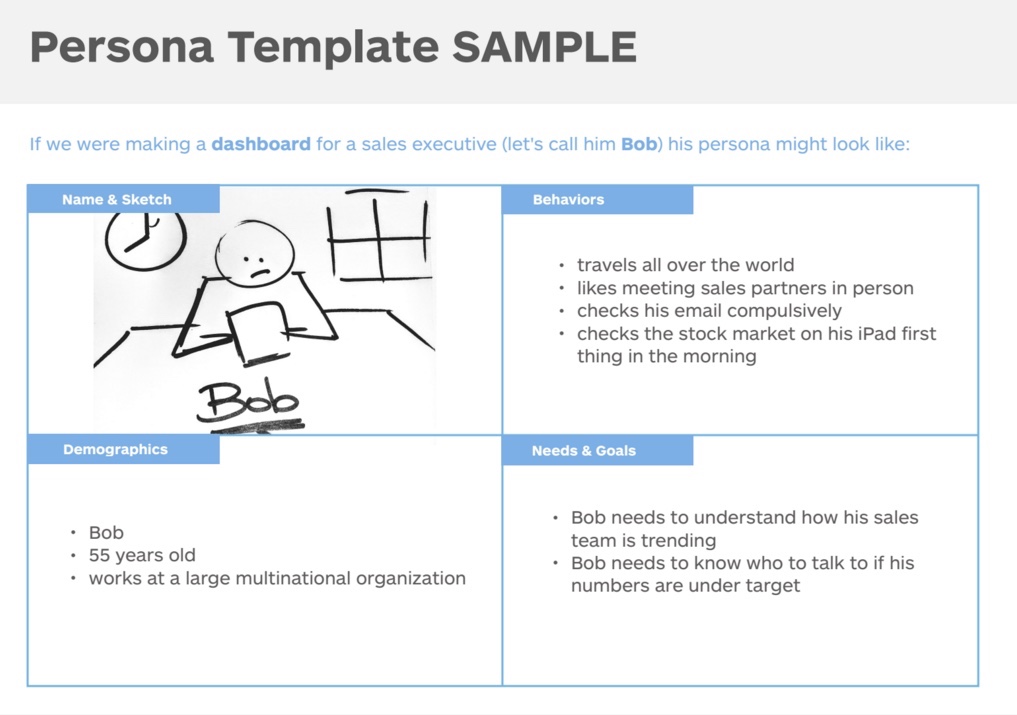
Draw a template on the board with the following in each quadrant:
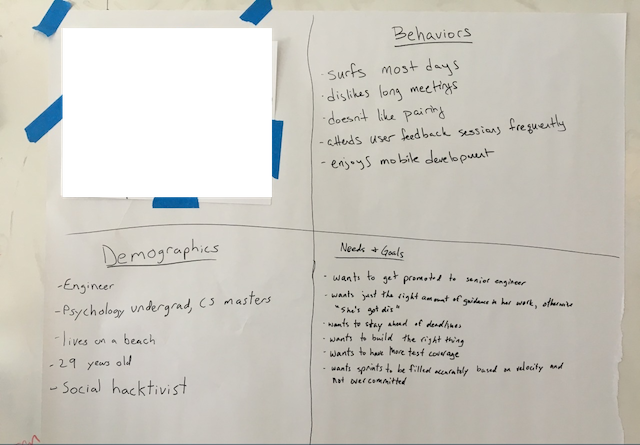
- Top left → drawing of person in a place, doing an action, with a name, face, emotion, and thought
- Bottom left → demographics (facts like name, age, role, income, location, gender)
- Top right → behaviors (things they do, likes, dislikes, hobbies)
- Bottom right → needs and goals (wants, pains, hopes)
-
Have the teams (or individuals) work silently for 7-8 minutes to fill out paper according to the template
-
Ask each team to send a representative (or have each individual come) to the board to hang the persona and describe the person they created for the group
-
Give each person four dots so that they can place a dot on the quadrant that they think best explains the user (so four dots in total, one on each quadrant across all papers)
-
Tape together the highest scoring quadrants into one consolidated persona and reads it to the group
Tip: It’s helpful to have scissors handy in case you need to cut quadrants apart in order to reassemble
-
Plan out how to get access to people that this persona represents and the user research activities that you will do to validate this persona. Check out activities labeled Discovery in the Tanzu Practices center for different options.
Success/Expected Outcomes
Success is when you’ve created a consolidated proto-persona and everyone in the room feels like it represents the target audience as best as possible. Remember that a critical next step is to then validate this persona with user research such as interviews
Variations
Machina Personas
If you’re building a “technical” product like an API and your user is a system (such as existing apps that you must integrate with), you may need to create machina personas.
The key difference are the quadrants you have
- Top left → drawing a personification of the machina persona
- Bottom left → About (facts like the name of the system, age, type, languages/formats it understands)
- Top right → Needs & Responsibilities (input it requires, what it does with that input, what it does in general)
- Bottom right → Quirks (any difficulties or peculiarities when integrating/interacting with the system)
For Remote Teams
You can still facilitate this workshop even if the team is remote.
While many on-line collaboration solutions have drawing features, we suggest keeping thing low-tech: use paper and cameras.
- Have people draw upon actual paper as described above.
- Next, have them take a photo on their phone and upload the photo to the collaboration space. Alternatively, people can send the photos to the facilitator via chat app, email, or even text message. They can even hold up their drawings to their webcam – the facilitator can take a screenshot, then add the image to the collaboration space.
Real World Examples


